How to setup muOS on the Anbernic RG35XX SP
Installing muOS on the SP
Grab the latest download from the muOS website, likely the top entry: https://muos.dev/release/plush Currently the download folder is https://dl.muos.dev/RG35XX-SPLUSH24/
Then unzip the .zip file and flash the image to a microSD using a tool like Etcher.
Insert into the TF1 slot of the SP and it will run it's initial install/setup process, and after that you're good to go!
Re-Mapping Folders
Point muOS at your Stock OS saves folders
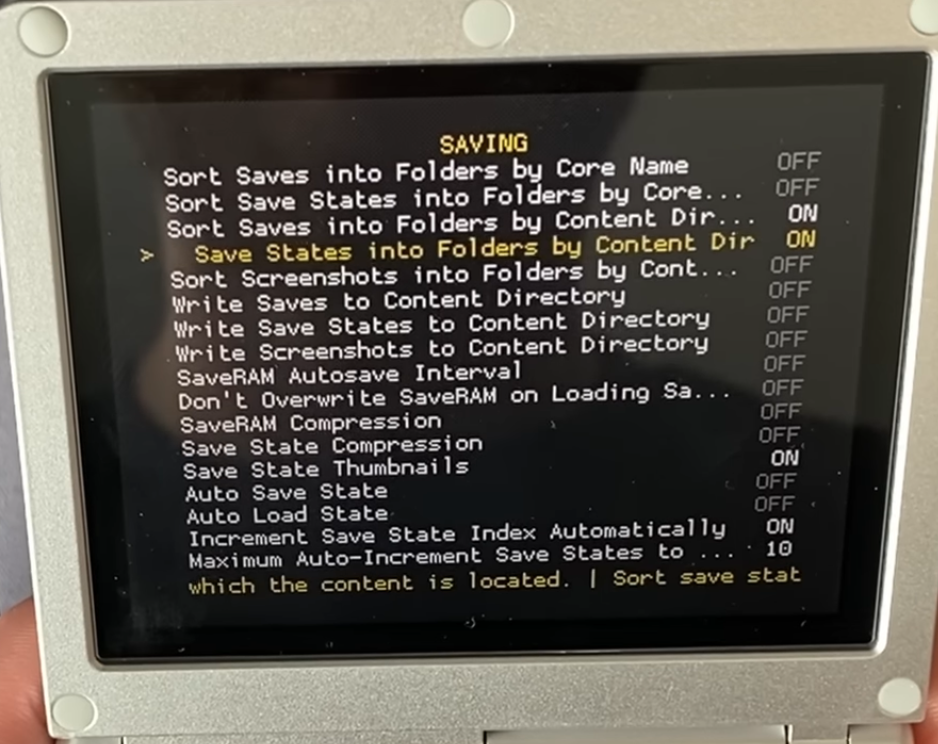
Go to Applications>RetroArch>Settings>Saving, and set the top four settings as follows:
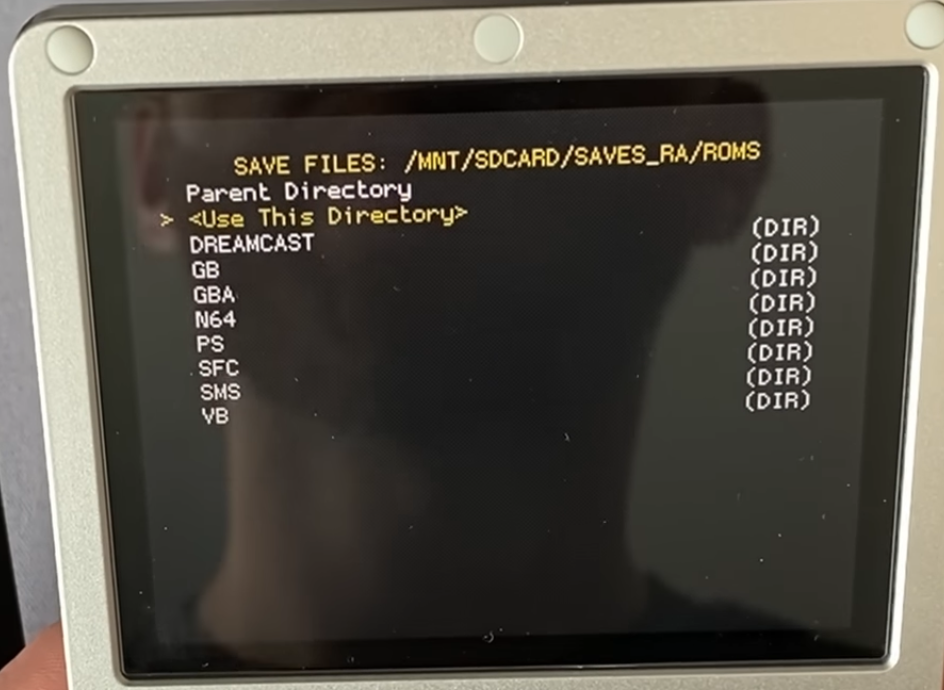
Then head to RA main menu>Settings>Directory>Save Files, select it, and then browse to the location shown below, then choose "Use this directory". Note that you may need to hit "Parent directory" a few times first before you can see the "SDCARD" folder:
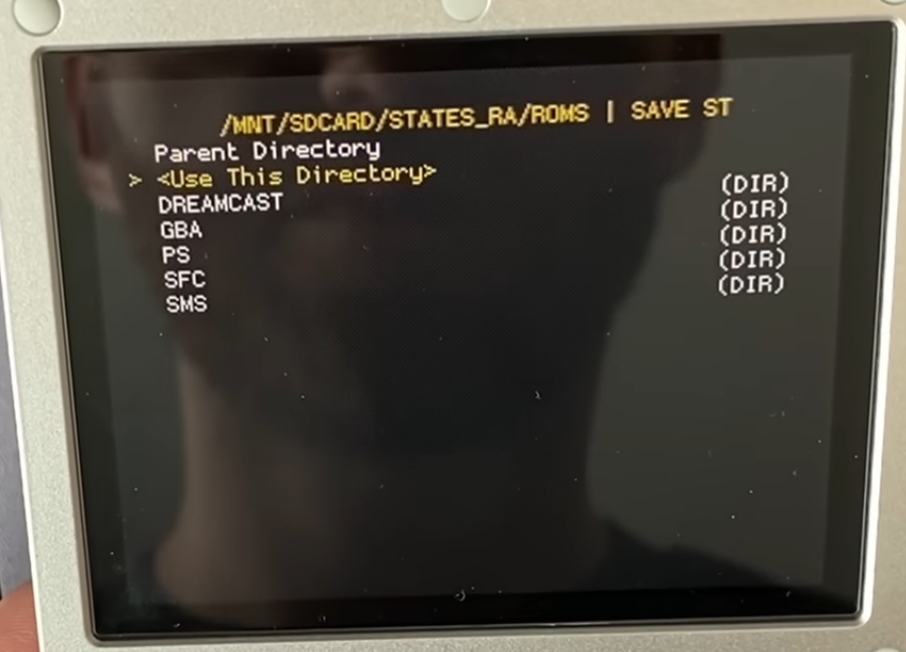
Now, while still in the RA Settings Directory menu, choose "Save States", then browse to the folder location below (it will be right by the saves location you used in the previous step):
Finally, head to the RA main menu, then go to Configuration File and Save Current Configuration:

Adjust Stock OS save folder settings
If you plan to flip between muOS and the Anbernic Stock OS often, you'll want to open RetroArch on Stock OS, go to Settings>Saving, and set the top four settings as follows, to match what we set for muOS above:
Accessing the web interface on muOS
Grab the IP address of your SP from Configuration>Wi-Fi Network, and the IP address will be in the bottom-right corner.
Then, on a computer on the same Wi-Fi network, go to https://:9090, and login with username and password "muos", to get the below web interface:

Update N64 controller mapping in muOS
To update the N64 controller mappings, first determine what N64 emulator you are using on your SP. At the time of this writing and if you're unsure which one to use, I recommend using the "rice" option, and you can change that using the Changing Cores steps on this page.
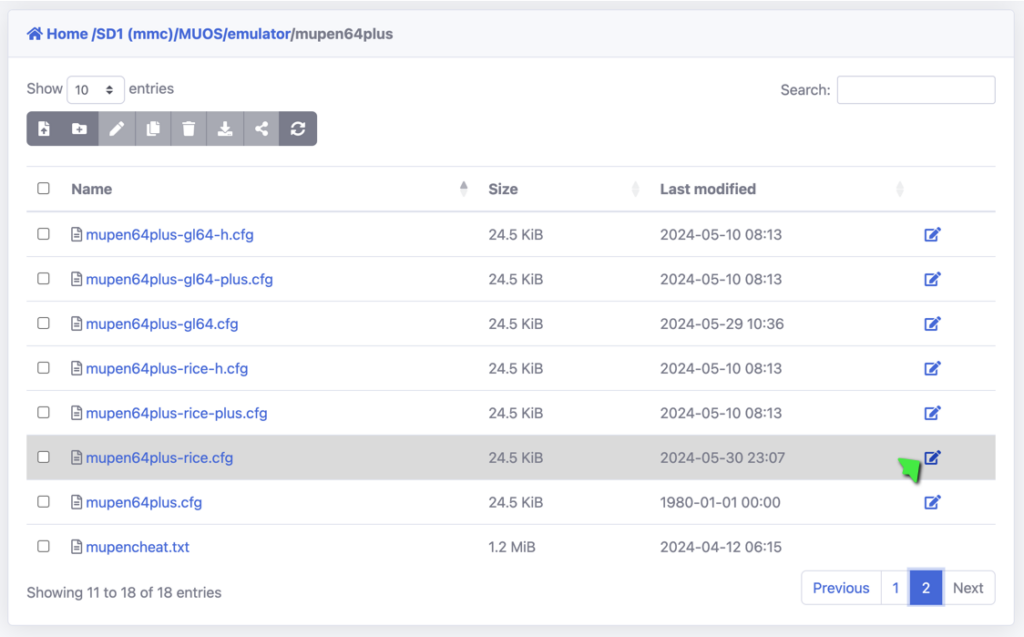
Once you know what version you're using, browse to /SD1/MUOS/emulator/mupen64plus, and then choose the .cfg file that corresponds to your variant of choice. For example, for "rice", I'm editing the "mupen64plus-rice.cfg" file, as shown below.
The controls I chose to use are as follows:
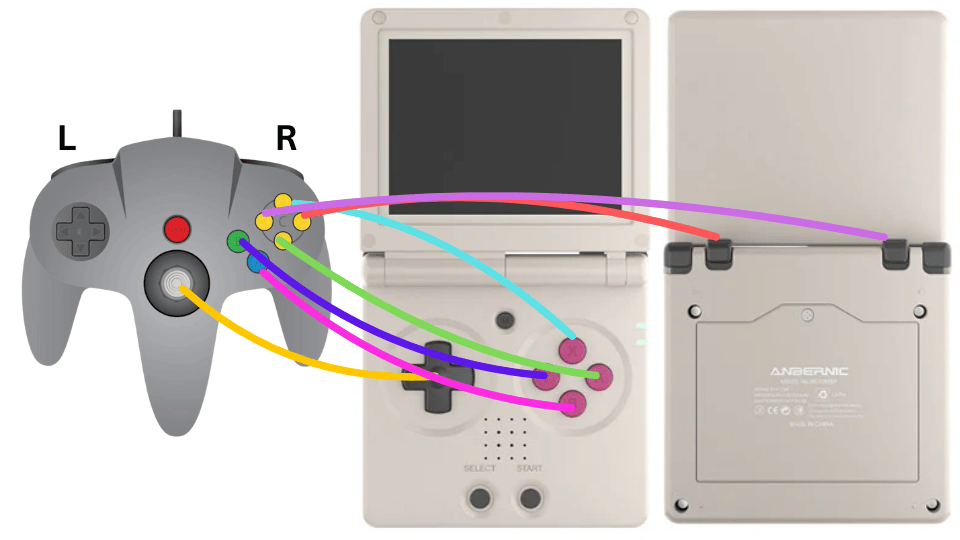
Essentially the D-Pad is analog direction, B and A are B and A, X is C Up, Y is C down, L2 is C Left, R2 is C Right, L bumper is L bumper and R bumper is R bumper.
To apply this config, or your own version of it, edit the appropriate config file, either by plugging the SD card into your computer, or through the 'edit file' button of the web access shown below:
Scroll down to where you see [Input-SDL-Control1] (for me it was around line 172), where the device "name" is "b'Deeplay-keys'". If you like, you can copy/paste my configuration below over top of what's there to get the same control scheme:
`[Input-SDL-Control1]

Version = 2
mode = 0
device = 0
name = "b'Deeplay-keys'"
plugged = True
plugin = 2
AnalogDeadzone = "328,328"
AnalogPeak = "32768,32768"
mouse = False
Mempak switch = "button(12)"
Rumblepak switch = "button(15)"
C Button R = "button(14)" # R2
A Button = "button(4)" # B
C Button U = "button(6)" # X
B Button = "button(5)" # Y
Start = "button(10)"
L Trig = ""
R Trig = "button(8)" # R1
Z Trig = "button(7)" # L1
DPad U = "hat(0 Up)"
DPad D = "hat(0 Down)"
DPad R = "hat(0 Right)"
DPad L = "hat(0 Left)"
Y Axis = "hat(0 Up Down) axis(1-, 1+)"
X Axis = "hat(0 Left Right) axis(0-, 0+)"
C Button D = "button(3)" # A
C Button L = "button(13)" # L2`
Save the file, and the next time you open that variant of Mupen64Plus (rice in this case), you should have your new control map in effect!
Copying Anbernic GB and GBA SP bezels over to muOS
The original Anbernic GBA bezels are stored in the folder shown below:

I copied them to the overlays folder that was in use (at the time of making the video), and renamed each file as shown below:
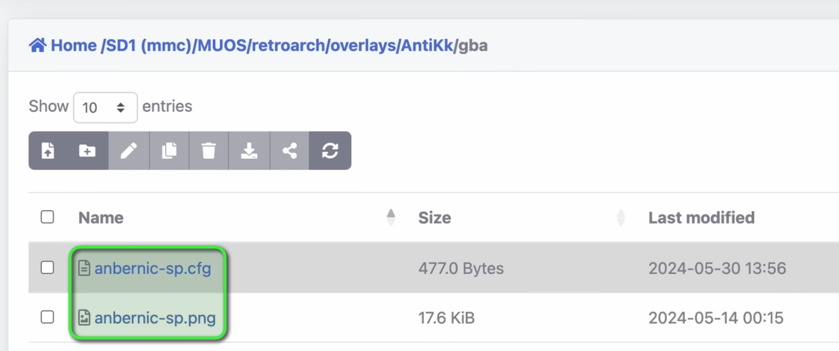
I then needed to edit the .cfg file to tell it the new name of its associated .png file, then save it:

Then in muOS, I opened a GBA game, hit the hotkey to open the Retroarch menu, browsed to On-Screen Overlay, and changed to the "anbernic-sp" overlay I just added:

I then hit B/Back until I got back to the Retroarch main menu, then down into Settings>Video>Scaling, and set it to the following settings:

Note that I had to toggle Integer Scale to ON temporarily to set the X, Y, Width, and Height settings to what I wanted them to.
I then went back to the RA quick menu, browsed to Overrides, and hit Save Content Directory Overrides:

After that your GBA bezels will be looking beautiful!

GB DMG bezels are the same process, just that the Scaling settings are as follows:

Install muOS themes
Join the muOS Discord server by following the link on their home page, then head to the 'Themes' tab which showcases all the available themes, and a .zip download will be available in the thread for that theme. The 'Beans' themes will have the prettier image-driven elements, if you prefer.
Some theme .zip files can be copied directly into the THEMES directory on the muOS SD card (SD1), however some are meant to be installed from the "Archive Manager", where you'll copy that .zip file to the ARCHIVE folder on your muOS SD card, then head to the Archive Manager app on your device (from the Applications menu), highlight the .zip file you just added, and press "A", which will unpack the file into the correct locations. Either way, you can enable the theme from Config>Themes as you please.
Various tips & tricks
How to install Portmaster ports in muOS
The latest information about muOS's implementation of Portmaster can be found on the dedicated page on the website, however in a nutshell you just need to go to Applications>Portmaster, accept the update if it offers one, and then install any ports you like. If some require additional files, it should give you instructions on the subsequent Portmaster screens. For example, for the Stardew valley port to work, I had to set my Steam download preference to "compatibility", download it, browse to the files on my PC, and then copy those files to the new "stardewvalley" folder located in the SD2/ports folder.

How to change cores for a console rom folder in muOS
While in the Explore view, you can browse into a console folder, and while hovering over a game you can press SELECT to choose from the available cores, which should set that core as the core association for that console folder.
Note that I've found that opening a game from the History page sometimes doesn't honour that assignment, so keep that in mind if you open a game there and the settings seem different.
muOS & emulator shortcuts/hotkeys
General hotkeys are documented on the muOS home page, and emulator-specific (non-Retroarch) shortcuts can be found on their specific pages on the website, such as for Mupen64Plus and DraStic.
How to make backup images of your microSD cards
If you're unsure of a change you're about to make or want to make a perfect clone of your SD card to copy to another (like when you want to move from the original Anbernic SD card to a higher quality one), use ImageUSB to create a .bin file, which can then be re-flashed to an SD card using the same tool.
How to make your own muOS themes
The masterclass of theme making is Vague Parade's video here.